Introduction
When it concerns fencing solutions in Australia, Colorbond fencing sticks out as one of the most popular options. Prominent for its durability and aesthetic appeal, Colorbond steel fences not just offer security however also enhance the visual charm of your home. With a variety of colors and styles available, comprehending the setup procedure is important for house owners aiming to invest in this long-lasting service. In this post, we'll delve into the ins and outs of setting up a Colorbond fence, guiding you through every step to make sure a smooth process.
Understanding the Installation Process of a Colorbond Fence
Installing a Colorbond fence can appear intimidating initially look. However, by breaking down the process into workable steps, anybody can tackle this job with self-confidence. The key is preparation and understanding what to expect.
What Is Colorbond Fencing?
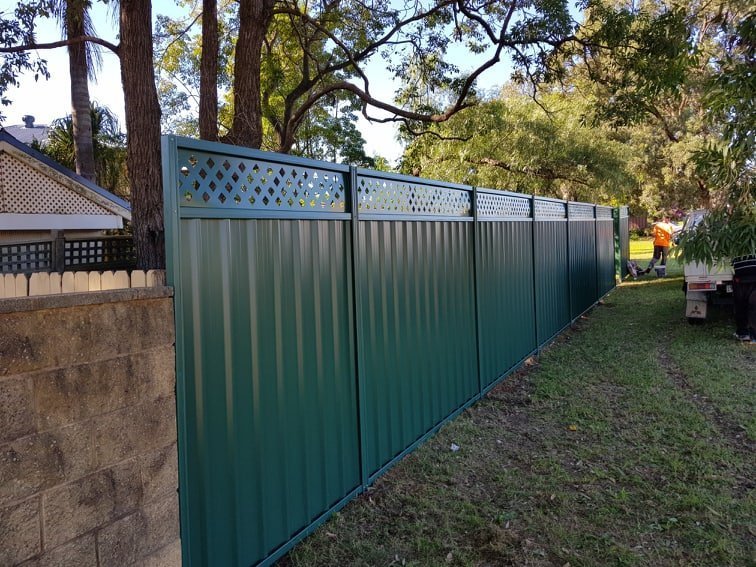
Colorbond fencing is made from premium steel covered with a protective layer that provides resistance to rust and corrosion. These fences are available in various colors and styles, making them suitable for diverse architectural designs.
Why Pick Colorbond Steel?
- Durability: Constructed to stand up to Australia's severe weather conditions. Aesthetic Appeal: Available in many colors that can complement any home design. Low Maintenance: Needs minimal upkeep compared to conventional timber fences. Security: Offers improved security due to its robust structure.
Preparing for Your Colorbond Fence Installation
Assessing Your Property Line
Before you even consider installing a fence, it's crucial to identify your residential or commercial property's borders. This ensures you don't mistakenly infringe on your next-door neighbor's space.
How Do You Examine Home Lines?
You can validate home lines by:
Checking your land title documents. Consulting with your local council. Hiring a professional property surveyor if necessary.Choosing Your Colorbond Fence Design
The charm of Colorbond fencing depends on its adaptability. You can pick from different heights, designs (such as flat-top or scalloped), and a comprehensive scheme of colors.
What Elements Must Influence Your Choice?
- Neighborhood aesthetics Local building regulations Personal taste
Gathering Necessary Tools and Materials
Before starting the installation process, collect all vital tools and products:
- Digging tools (post hole digger) Level String line Measuring tape Colorbond panels Posts and rails
Step-by-Step Installation Guide for Colorbond Fencing
1. Marking Out Your Fence Line
Using stakes and string lines, mark out where your fence will go. This gives you a clear visual representation of the area you're working in.
Why Is This Step Important?
https://jsbin.com/dawuhoyugeMarking helps avoid errors during installation, making sure that your fence is straight and aligned correctly.
2. Digging Post Holes
Once you've marked out your area, it's time to dig post holes. Normally, these ought to be around 600mm deep for stability.
Tips for Digging:
- Use a post hole digger for clean cuts. Ensure holes are spaced according to your panel lengths (typically around 2.4 m apart).
3. Establishing Fence Posts
After digging holes, place your posts into them, guaranteeing they are level before filling with concrete or gravel for stability.
How Long Does Concrete Take to Set?
Concrete normally takes about 24 hr to fully set but may require a long time before it's strong enough to support panels.
4. Attaching Rails
Once your posts are safe and secure, attach horizontal rails between them utilizing brackets or screws developed specifically for Colorbond fencing.
5. Setting up Panels
Now comes the enjoyable part-- installing your Colorbond panels! Slide each panel into place between rails till all areas are installed.
What If Panels Do not Fit Properly?
If panels appear misaligned or too tight:
Double-check measurements. Adjust rails as necessary.
6. Ending up Touches
Finish off by adding caps on top of posts if needed and making sure everything is clean and level before stepping back to admire your work!
Maintenance Tips for Your Colorbond Fence
While among the significant benefits of utilizing Colorbond steel is low upkeep, some care is still required:
Regular Cleaning up Schedule
Keep dirt and particles off surfaces by hosing down every few months.
Inspecting for Damage
Occasionally check for scratches or dents that may require touch-ups with paint developed for metal surfaces.
Frequently Asked Concerns (Frequently asked questions)
1. What is the lifespan of a Colorbond fence?
Colorbond fences can last over 20 years with appropriate upkeep due to their long lasting product composition.
2. Can I set up a Colorbond fence myself?
Yes! With standard do it yourself skills and tools at hand, numerous property owners go with self-installation after extensive planning!
3. Are there color choices available?
Absolutely! There are over 14 various colors available that match different style preferences!
4. How do I keep my fence?
Regular cleaning with water will be enough; periodic evaluations will assist identify any issues early on.
5. Can I paint my Colorbond fence?
While possible, it's normally not suggested as it may void guarantees; always seek advice from makers' guidelines first!
6. What must I do if my fence gets scratched?
Minor scratches can typically be touched up utilizing specialized metal paints; make sure compatibility before application!
Conclusion
In conclusion, understanding the installation process of a Colorbond fence gears up homeowners with important understanding that simplifies what may at first appear like an overwhelming task. By following each step diligently-- from assessing residential or commercial property lines to routine maintenance-- you'll ensure not only a visually pleasing addition to your home but likewise one that boasts longevity versus Australia's unforeseeable environment conditions.
Whether you pick do it yourself setup or employ professionals, accepting this strong fencing option will undoubtedly improve both security and design! So grab those tools-- your new lovely privacy awaits!